Anyone who’s had a computer for an extended period of time will know
how disgusting a keyboard can get. The keys tend to develop a layer of
grime on top, while accumulating dust, food and hair underneath.
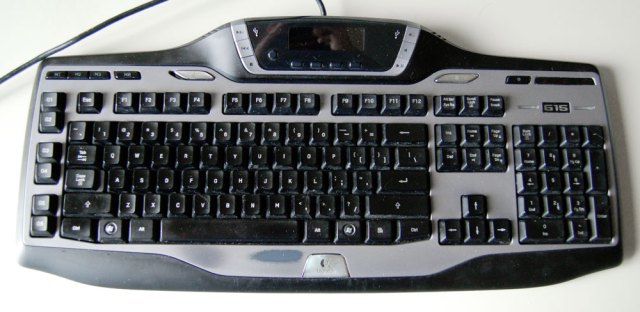
Gross, isn't it?
I got sick of looking at all the grime on the Logitech G15 I use, and
decided to pull it apart and clean it in the name of curiosity. And
since disassembly guides for the keyboard aren’t easy to find, I decided
to post my findings here.
So, shall we begin?
Getting Started
Firstly, a disclaimer. I’ll take no responsibility if your keyboard
no longer works after reassembly. Any screw-ups are your problem to deal
with. So if you’re not confident with pulling things to bits and
putting them back together again, then don’t do it on anything valuable.
This guide is only here to tell you what to expect upon opening it up,
how to clean the keys, and in what order to put everything back in
again.
It’s also worth mentioning that this guide doesn’t show how to open
up the part that houses the screen and media playback buttons. Sorry,
this guide won’t really help you if that’s what you’re looking to clean.
If you’ve decided to proceed (at your own risk), then let’s get started.
What you’ll need:
- A Logitech G15 Generation 2 Keyboard, preferably past its warranty.
- A set of small screwdrivers (Flathead and Philips).
- A small brush and a cloth for cleaning.
- A few hours (unless you’re really quick).
Rule Number One
Unplug the keyboard. Don’t be like one of my high-school classmates
who tried to pull the motherboard out of a computer while it was still
plugged in and running.
Opening it up
Turn the keyboard over and unscrew all the screws on the back. There
should be 18 of them. Don’t worry about the keys, they will not (and can
not) fall out.
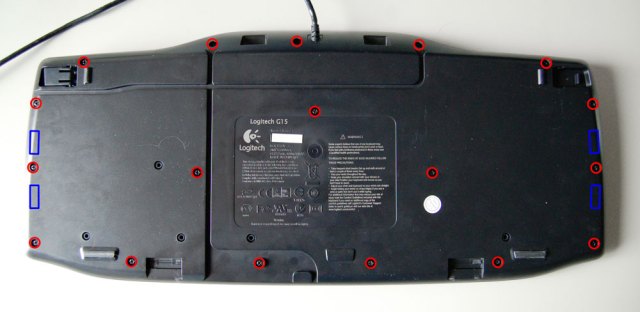
Screws are circled in red. The hidden clips are marked with blue rectangles.
Don’t lose the screws. Put them somewhere safe, and count them to make sure you’ve got the right amount.
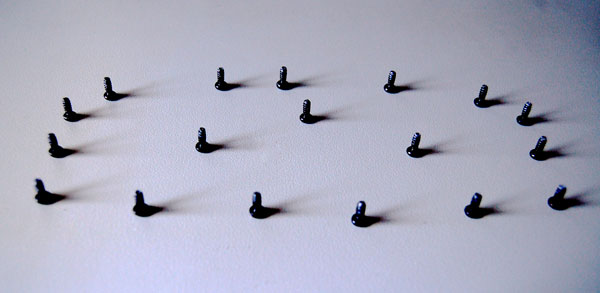
Got all 18 screws? Check.
You’ll notice that the keyboard is still holding itself together.
There are four catches in the sides which will need to be unclipped. To
do this, gently pry open the shell with a screwdriver at the top corner
of the keyboard and work downwards. Be careful not to put the
screwdriver too far inside the keyboard as you pry it open. It should
require a bit of wiggling and gentle force to pop each clip open.
As you open the keyboard up, be careful that you don’t stress the ribbon still holding it together.
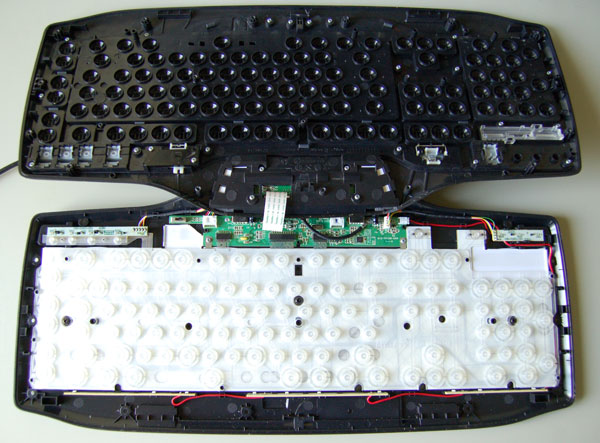
This is what it should look like inside.
Removing the ribbon is easy enough, but requires a bit of care.
Firstly, find where the ribbon meets the the circuitboard of the bottom
half of the keyboard, and locate the little black piece of plastic
holding it in. Pull the little piece of plastic upwards, making sure you
use the same amount of pressure on both sides. Once it comes up far
enough, the ribbon should practically fall out.
Just make sure you don’t break that little black clip. I broke a clip
like it in my Gen1 Nintendo DS, and it’s been causing me troubles ever
since.
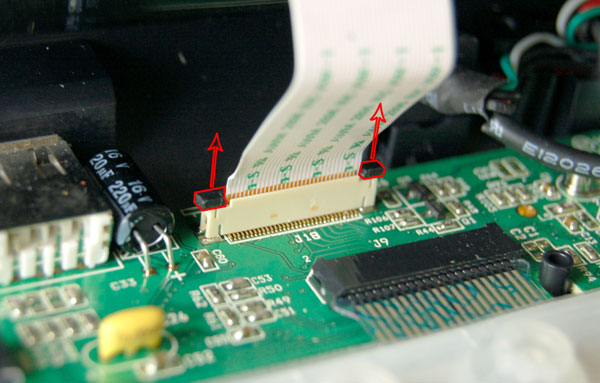
Pull the little black clip upwards to release the ribbon.
Now the two parts of the keyboard should be free! Give the rubber a
quick brush off, and set that whole half of the keyboard aside.
Removing the silver face panel
The next step is to remove the silver panel on the face of the
keyboard. This part tends to collect a lot of grime, so it’ll be easier
to clean once it’s been removed.
Use a Phillips head screwdriver to remove the 19 screws that hold the
faceplate on. In the photo below, they’re marked with red circles. And
again, don’t worry about the keys falling out. They won’t.
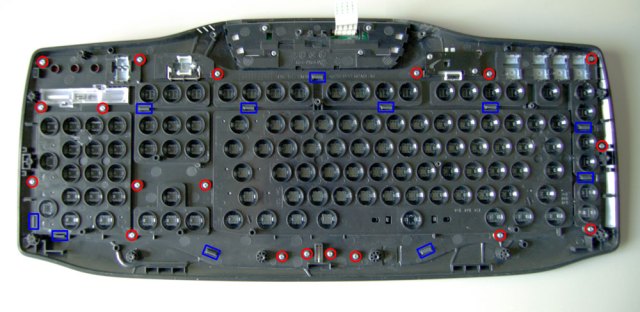
The screws are marked by red circles, and the clips have blue rectangles.
Once all the screws are out, start opening the clips that hold the
faceplate on. They are marked by blue rectangles in the picture above.
Remember to put the screws in a safe place, and make sure you don’t mix them with the other screws. They’re different sizes.
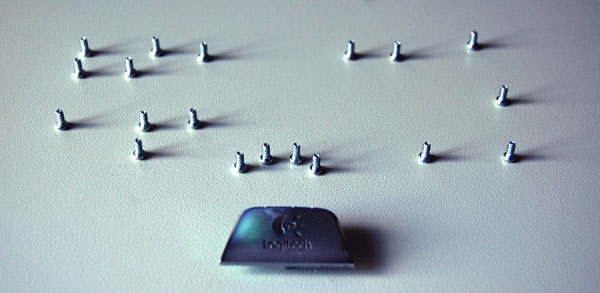
The 19 screws that hold the faceplate on. The Logitech plate is held on by two of the screws. Make sure you don't lose them.
Now the faceplate should be free.
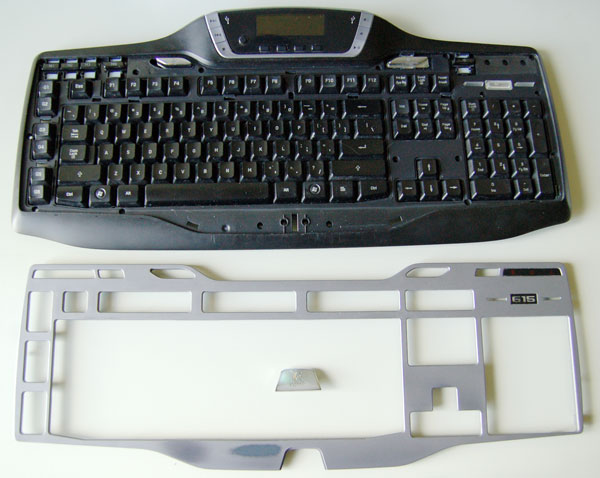
the freed faceplate.
Now is a good time to start cleaning it. Take a moist cleaning cloth
and wipe the scum off the front and edges of the faceplate. I used water
on the cloth, and it only took a little bit of rubbing to remove the
buildup. Take note that cleaning chemicals may have unintended side
effects, such as discolouration, or outright dissolving the plastic
(unlikely, but possible). If you’re going to use chemicals, test them on
the underside to make sure nothing bad happens before using them on the
front.
Once the faceplate is clean, set it aside. It’s time to start popping the keys out.
Removing the Keys
As you’ve probably noticed by now, the keys will need to be popped
out individually if you’re going to have a proper chance at cleaning
them. To do it, you’ll need two small flathead screwdrivers (or
similarly shaped objects). Take the screwdrivers and use them to push
the clips on the keys inwards and downwards. Make sure you catch them as
they come out.
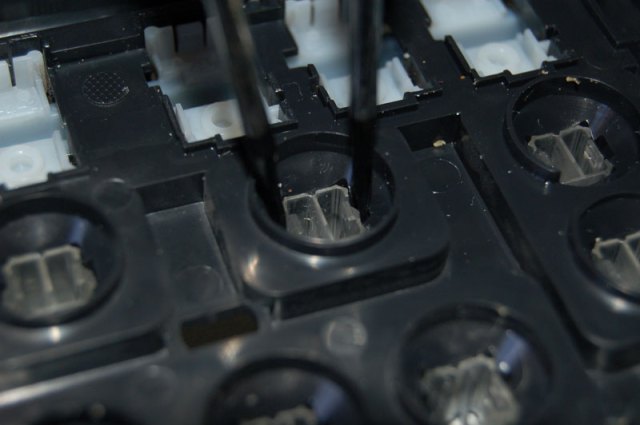
A closeup of the process of key removal.
The only key I had difficulty with was the Space Key – It had four
clips instead of two. I can’t give much advice on how to get it out,
aside from being patient and persistent.
Also, you may notice that wider keys like the Shift and Enter keys
have pieces of wire under them. They do not get in your way when taking
the keys out, but when you put the keys back in, you’ll have to put the
wire in place first.
If you keep at it, you’ll have all the keys out soon enough. Once they’re all free, it’s time to give them a much needed wash.
Cleaning the keys
The first thing I cleaned was not the keys, but the board itself.
You’ve probably noticed by now that this is where all the junk in your
keyboard hides. Take a brush and wipe all the junk out. Once it’s
cleaned to your level of satisfaction, wipe all the exterior surfaces
with the moist cloth. With a little bit of rubbing, all the caked on
gunk should come right off.
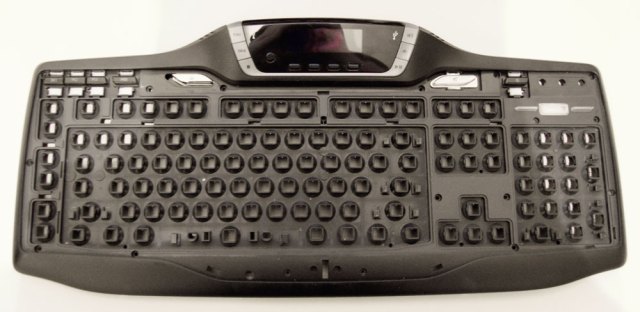
If a keyboard has no keys, is it just called a board?
Once the “board” is clean, set it aside with the other main parts. It’s time to work on the keys.
Cleaning the keys is pretty much the same process as cleaning every
other part of the keyboard. Just wipe the top and sides of the keys with
a moist cloth. It’s also worth checking under the keys to see if
there’s any hair or bits of junk under them. If there is, just brush it
out.
You may notice that certain parts of the keys remain rough even after
rubbing at them with the cloth. I suspect that this is all that remains
of the original matte finish of the keys. In other words, it’s where
the keys haven’t been polished smooth over time by your fingers.

This is how the keys are laid out. I think I might have OCD.
After I’d finished cleaning each key, I laid them all out on position
on the desk. I found this pretty helpful when it came to putting it
back together again…which coincidentally is the next thing to do, if
you’re happy with how you’ve cleaned it out.
Putting it back together again:
Putting the keyboard back together is relatively simple. It’s basically like pulling it apart – except backwards.
- Push all the keys back into the keyboard. I’d recommend putting in any keys with wire backings first. Any keys that stick or jam are probably in the wrong place.
- Clip the silver face panel onto the keyboard, then screw it back on. Don’t forget about the Logitech plate.
- Put the ribbon back into its socket, and push the small black clip down to fasten it in place.
- Make sure that the Windows Key lock switch is in the right place. You’ll find out soon enough if it isn’t.
- Fold the keyboard closed and squeeze the 4 clips at the sides of the keyboard to snap them shut.
- Put in all 18 screws.
Well, that was a bit of an ordeal, but the result is definitely worth it.
Conclusion
This is the first guide of any sort that I’ve put online, so let me
know what you thought of it. Likewise, if I missed anything, or
inaccurately said something, let me know in the comments so I can fix
it. Anyways, thanks for reading, and enjoy your clean new keyboard!

